Confirm it's actually the flashing
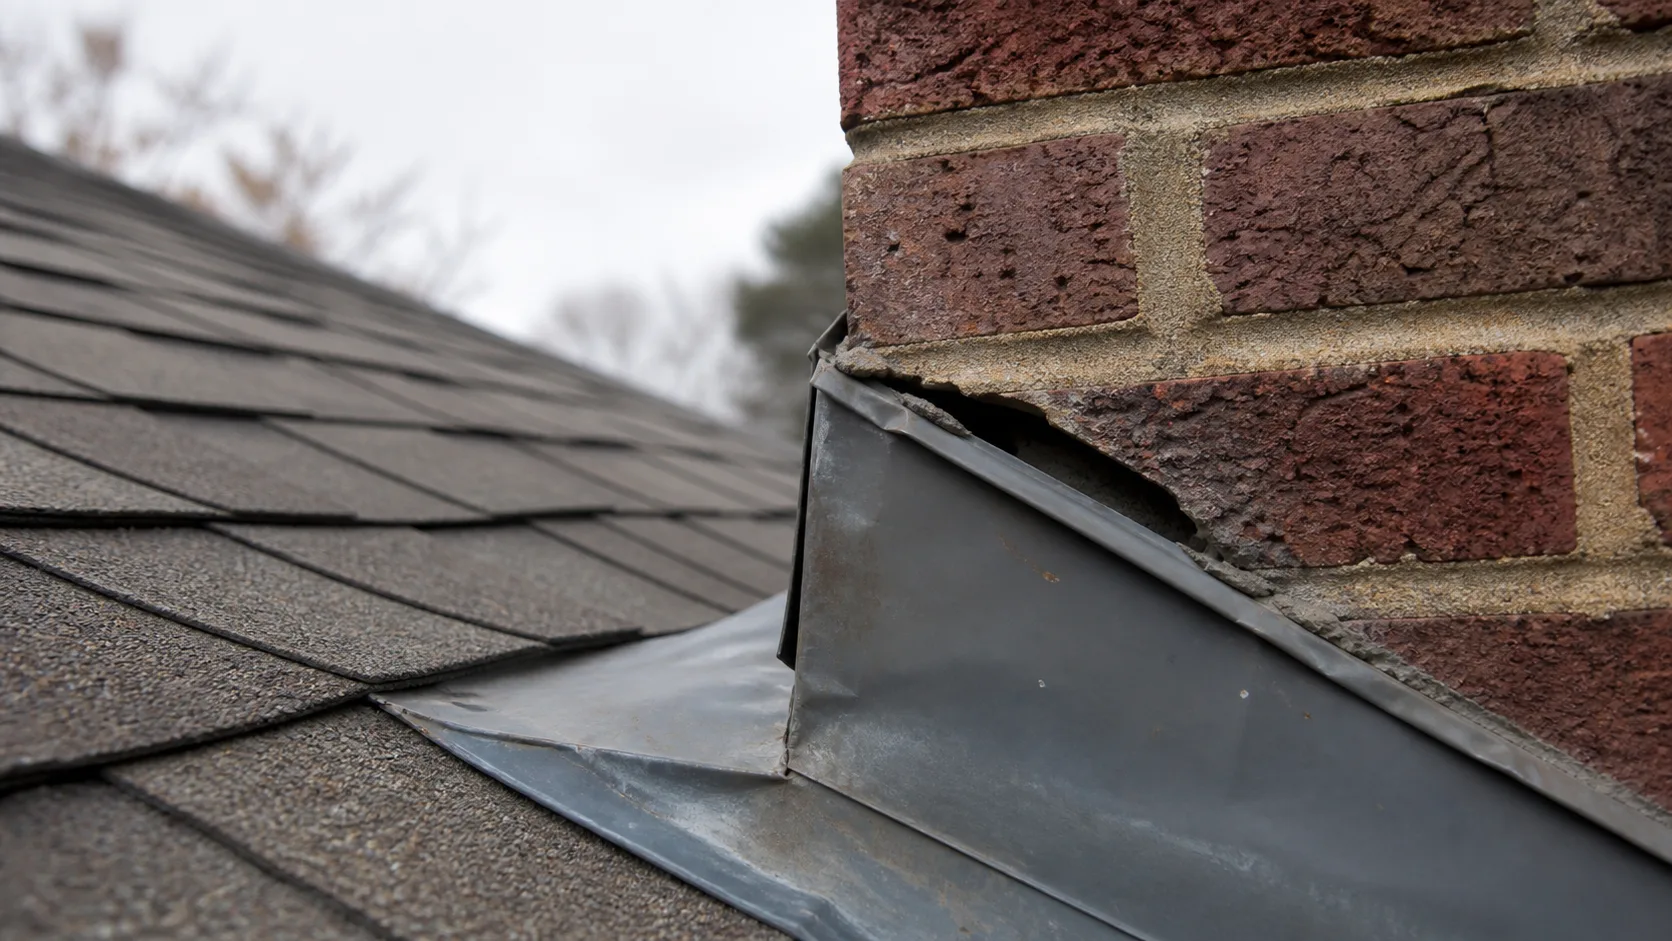
Before buying materials, make sure flashing is really the source. Most chimneys use two flashing pieces working together: step flashing, individual L-shaped pieces woven between each shingle course up the side of the chimney, and counter-flashing, a strip embedded into the mortar joints above it that overlaps the step flashing and sheds water over it. A gap opening up between the two is one of the most common places a leak starts.
Look for:
- A visible gap between the metal flashing and the surrounding shingles or roofing material
- Rust spots or actual holes forming in the metal itself
- Sealant along the flashing edges that's dried out, cracked, or pulled away
- A section of flashing that's visibly lifted, bent, or no longer sitting flush against the roof
A leak that shows up specifically near a chimney, a plumbing vent, or a skylight points strongly toward flashing rather than shingle damage somewhere else on the slope.
Fixing it, from simplest to most involved
Work through these in order. Most flashing problems stop at step 1 or 2.
Reseal existing flashing
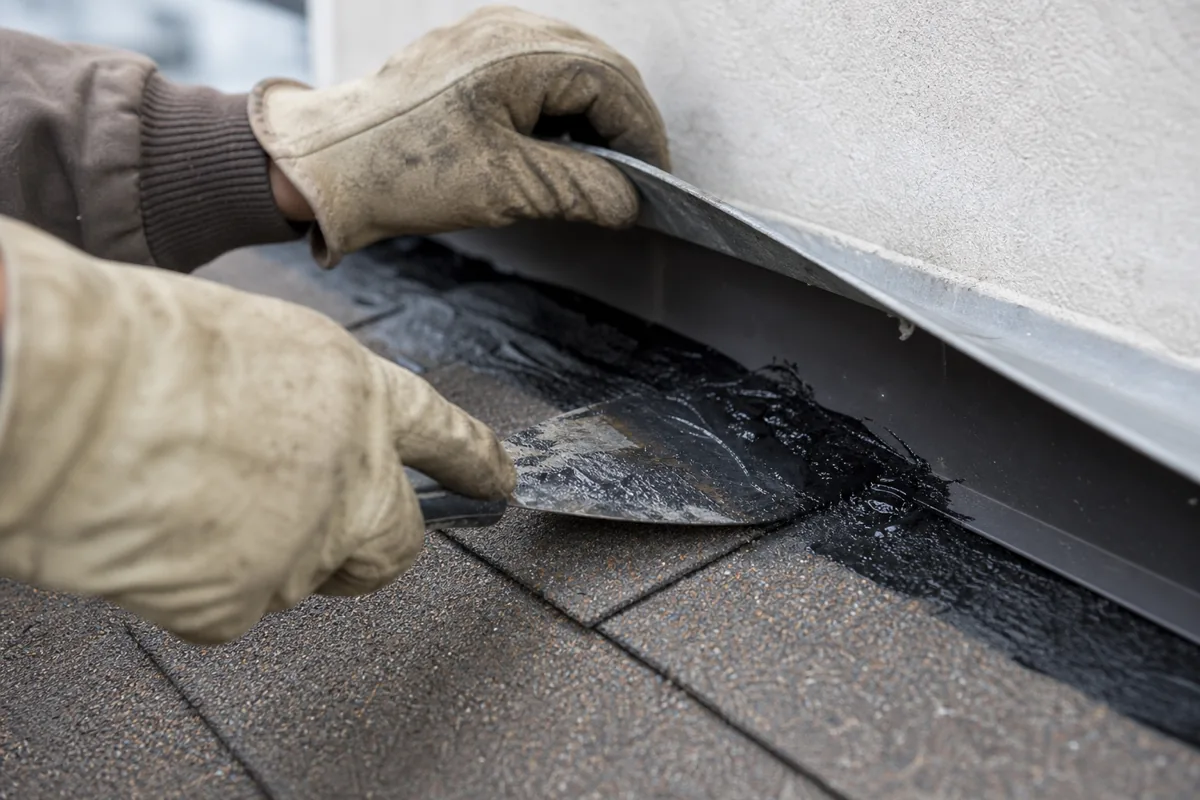
If the metal itself is intact but the seal along its edges has failed, clean out any old, cracked sealant with a putty knife, then apply a fresh bead of roofing cement or sealant along the joint. This is the fastest fix and handles a large share of flashing leaks on its own.
Re-secure flashing that's lifted or loose
If a section has come loose from its fasteners but isn't damaged, refasten it with roofing nails and reseal the edges. Check that the flashing sits flat against the roofing material before sealing; a piece that's still slightly lifted will leak again even with fresh sealant on top.
Replace a short section of damaged flashing
If the metal is rusted through or cracked, resealing won't hold. This means lifting the shingle course above the damaged section, removing the old flashing, and sliding in a new piece cut to match. It's more involved than the first two steps but still within reach for someone comfortable with basic roofing tools.
Full flashing replacement, beyond DIY scope
Replacing an entire chimney's flashing system, or valley flashing that runs the length of a roof seam, generally means removing more shingles and working with masonry counter-flashing. This is the point where most homeowners bring in a roofer rather than continuing solo.
Materials you'll need
- Roofing cement or roofing sealant (see the distinction below)
- Replacement flashing, aluminum or galvanized steel, matched to what's already on the roof
- A flat pry bar for lifting shingles
- Roofing nails
- A caulking gun if using a cartridge-style sealant